It is a scene almost every Indore homeowner recognises. A family spends ₹60,000–₹80,000 on a full interior repaint ahead of a daughter’s wedding. They choose premium Asian Paints Royale, standard wall putty, two coats-the works. Eighteen months later, the kitchen wall adjacent to the bathroom has a damp patch. The hallway ceiling has a hairline crack that has opened up and let paint peel in a strip. One bedroom wall near the AC unit has bubbled paint from condensation. They call the painter. He says the paint was good quality-”aisi cheezein hoti rehti hain” (these things happen). He quotes for a touch-up. They pay again.
I have been painting homes in Indore since 1980. In my 45 years in the trade, I have never seen a paint job fail because the paint was poor quality. I have seen thousands fail because of what was done-or not done-to the wall before the paint went on. Surface preparation is not a step in the painting process. It is the painting process. Everything else is just colour.
Interior paint durability has three true determinants: substrate condition (is the wall dry, sound, and properly treated?), primer system (is the correct primer specified and applied?), and application conditions (is the environment correct for the paint to cure properly?). The paint brand is fourth on this list. This is what most painters do not tell homeowners-because the painter’s labour income is fixed regardless of the preparation quality, and rushing preparation saves them time.
If you are planning an interior repaint for Diwali this year-October or November-you are in exactly the right position right now. The monsoon ends in September. That gives you three to four weeks for walls to dry before painting begins. Read this guide completely before calling a single painter. It will change the conversation.
Secret 1: The Wall Must Be Genuinely Dry Before Any Paint Is Applied
Interior paint applied to a wall with moisture content above 12% will fail within one to two seasons regardless of paint brand. In Indore, walls absorb significant moisture during the June–September monsoon and require three to six weeks of dry weather after the last rain before they are ready for painting. A moisture meter confirms readiness-guesswork does not.
Why moisture content matters: Paint forms a film on the wall surface by bonding to the substrate through a primer adhesion layer. If water is present between the wall and the primer, it prevents complete bonding. As the wall continues to dry after the paint is applied, water vapour pushes outward through the paint film. This causes bubbling, blistering, and-if the moisture is carrying salts-the efflorescence cycle described in our Efflorescence (Shora) Explained guide.
The 12% rule: The maximum acceptable wall moisture content before painting is 12% for most interior emulsions and primer systems. Below 8% is ideal. This is not a guideline-it is a specification stated in the technical data sheets of major brands like Asian Paints, Berger, and Dulux. Painters who begin work in September when walls are still at 18–22% moisture are not following the product specification. The paint will fail. The only question is whether it fails in six months or eighteen.
Indore’s post-monsoon drying timeline: A standard brick-and-plaster exterior-facing room wall in Indore after a heavy monsoon season typically requires four to six weeks of dry weather to reach 12% moisture content-measured at mid-wall depth, not just the surface. The surface can feel dry to the touch when the interior of the wall is still at 20–25% moisture. This is the most common mistake in post-monsoon painting in Indore: surface-dry is not wall-dry.
What homeowners can ask: Ask your painter to show you a moisture meter reading before work begins on any external-facing wall. If he does not own a moisture meter, he is guessing. In 45 years of painting in Indore, a moisture meter is one of the few pieces of equipment that consistently distinguishes a professional contractor from a daily-wage painter.
Secret 2: Wall Putty Is Not a Substitute for Primer-And Not All Putties Are Equal
Wall putty fills surface irregularities and provides a smooth base for paint, but it does not seal the wall or improve paint adhesion to the substrate. Primer does. Applying wall putty without a primer coat first, or using gypsum-based putty on a damp-prone wall, are the two most common causes of premature paint failure in Indore homes.
What primer actually does: A primer is not a diluted paint coat. It is a chemically formulated adhesion layer that penetrates into the plaster pores and creates a stable bonding surface for the putty and topcoat above it. Different primers are formulated for different substrates: alkali-resistant primers for fresh or damp-prone plaster, sealer primers for porous or powdery surfaces, stain-blocking primers for smoke-stained or heavily soiled walls. Applying wall putty directly to unprepared plaster-without primer-means the putty is bonding to loose surface particles, not to the stable plaster matrix. This is why putty peels in strips in the early years of a paint job.
The putty type problem: Most local painters in Indore use white cement-based putty (locally called “wall putty” or sometimes “POP putty”) on every wall in every condition. This is incorrect for two specific scenarios:
- On fresh plaster: White cement putty on new plaster that has not completed its initial carbonation curing (at least 28 days, ideally 60 days) will bond weakly because the plaster surface is still chemically active. It requires a sealer coat first.
- On damp-prone walls: White cement putty absorbs moisture readily. On an external-facing wall in Indore’s monsoon-adjacent seasons, white cement putty will swell, soften, and detach from the plaster long before the paint topcoat fails. The correct material for damp-prone walls is a polymer-modified putty or the moisture check and treatment steps covered in our Wall Dampness Treatment guide.
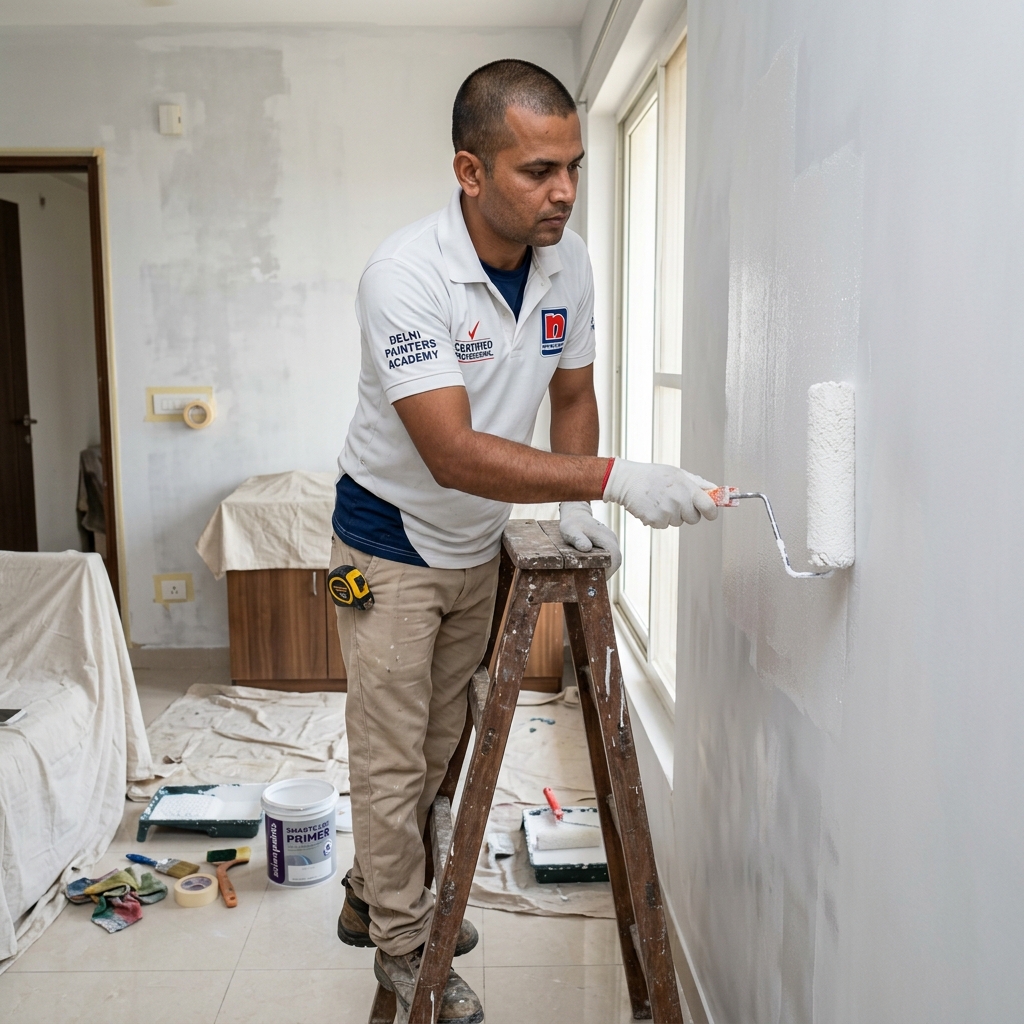
The primer-putty-primer sandwich: For maximum paint life on a smooth finish, the correct layering sequence is: alkali-resistant primer coat ➔ wall putty (two coats, sanded between) ➔ alkali-resistant primer coat ➔ topcoat emulsion. The second primer coat over the sanded putty is the step most frequently skipped by painters in Indore-it is the coat that seals the putty surface and provides the final adhesion layer for the emulsion. Without it, the putty surface remains slightly porous and the emulsion film bond is weaker than specified.
What homeowners can verify: Before any putty is applied, ask to see the primer can and confirm it is an alkali-resistant primer-not a white primer labelled simply as ‘wall primer.’ On external-facing or bathroom-adjacent walls, ask specifically whether the primer is rated alkali-resistant. The product name will say it. If the painter uses the same primer on every wall without differentiation, he is not specifying-he is defaulting.
Secret 3: New Plaster Must Cure for at Least 28–60 Days Before Painting
Fresh cement plaster is highly alkaline and requires a minimum of 28 days-ideally 60 days-before painting. Paint applied on uncured plaster is destroyed by the chemical alkali attack on the paint binder, causing saponification: the paint film becomes soft, loses adhesion, and peels within months regardless of paint quality.
The chemistry of curing plaster: When cement plaster is first applied, the cement hydration process releases calcium hydroxide-a highly alkaline compound with a pH of 12–13. This alkalinity gradually reduces as the calcium hydroxide reacts with atmospheric carbon dioxide over 28–60 days (carbonation). Standard paint binders-PVA, acrylic-are not resistant to pH above 10. Applied before carbonation is complete, the alkali attacks the polymer chains in the paint binder, breaking them down and causing the paint to soften and lose adhesion. This process is called saponification. The paint does not peel immediately-it may look fine for 6–12 months while the chemical damage accumulates, then fail suddenly.
Why this is common in Indore’s festive renovation cycle: Many Indore homeowners plan painting for the Diwali period (October–November). If construction or major plastering work finished in August or September, and the monsoon has just ended, there is pressure to begin painting immediately. A painter who starts in October on plaster finished in September is working on 30–45 day cured plaster-borderline acceptable, not ideal. On plaster finished in August that is now 60 days old and has fully dried post-monsoon, painting can proceed confidently.
The alkali test and solution: Professional painters use a pH indicator paper or a phenolphthalein solution to test surface alkalinity before priming. On a surface that turns deep pink or purple with phenolphthalein solution, the pH is above 10 and painting must wait or an alkali-resistant primer must be applied as the base coat. The alkali-resistant primer is formulated to resist saponification while the plaster continues to cure beneath it. This is not a workaround-it is the correct product for this scenario.
Secret 4: The Application Environment Matters as Much as the Product
Interior emulsion paint requires an ambient temperature between 10°C and 35°C and relative humidity below 85% for correct film formation and curing. In Indore, painting during monsoon (June–September) in rooms with high ambient humidity produces paint that never fully cures, remaining tacky, prone to fingerprinting, and likely to fail within one season.
Temperature and humidity windows: Indore’s optimal interior painting season is October through March-post-monsoon dry air, moderate temperatures, and low humidity create near-ideal film formation conditions. April and May are acceptable for interiors if the building is well-ventilated. June through September (monsoon) is problematic for interior painting in rooms with external-facing walls, poor ventilation, or ground-floor moisture exposure. The emulsion film absorbs ambient humidity during curing and can remain tacky for weeks, collecting dust and losing its early washability performance.
Ventilation during and after application: Emulsion paints cure through a combination of water evaporation and film coalescence. Good ventilation accelerates the evaporation phase and produces a harder, more durable film within the specified curing time (typically 4–6 hours to recoat, 7 days to full cure). Rooms with closed windows, high furniture density, or poor cross-ventilation cure more slowly, produce softer films, and are more vulnerable to early marking and staining. The practical instruction: keep rooms well-ventilated during painting and for at least 72 hours after the final coat.
The two-coat minimum with correct recoat timing: Every interior emulsion product specifies a minimum recoat time-typically 2–4 hours for modern quick-dry emulsions, 4–6 hours for standard emulsions. Applying the second coat before the first has dried to the touch (not just surface-dry-film-dry) traps solvent and water in the first coat, causing wrinkling, slow curing, and reduced adhesion between coats. Many painters in Indore apply the second coat on the same day as the first, often within 1–2 hours-a practice that consistently reduces the paint’s potential durability by 30–40%.
Secret 5: The Right Paint Grade for the Right Room-Not One Emulsion for Every Wall
Using the same interior emulsion grade across every room in a home is one of the most common causes of premature paint failure in kitchens, bathrooms, and high-traffic areas. Kitchen and bathroom walls require washable, moisture-resistant emulsions. Bedrooms and low-traffic areas can use standard matt emulsions. Mismatching the product to the room reduces paint life by 40–60%.
Kitchens and areas adjacent to bathrooms: These surfaces are exposed to steam, moisture, cooking grease vapour, and frequent cleaning. A standard interior matt emulsion (even a premium one) will absorb moisture over time, lose washability, and develop staining within two to three years in a kitchen. The correct specification: a high-sheen or satin washable emulsion (Asian Paints Royale Shyne, Dulux Velvet Touch Pearl Glo, or equivalent) that has a denser, non-porous film and can be wiped clean without the paint film degrading. The slightly higher cost per litre pays back through an extended repaint cycle.
Bathrooms: Standard emulsion has no place on bathroom walls. Bathroom walls require either a full waterproofing treatment (for wet areas up to 900mm height) before any paint, or a dedicated bathroom paint formulation with mould-resistant additives. The tiled area does not need paint. The upper wall above tiles-exposed to steam-needs a mould-resistant, moisture-tolerant emulsion. Do not use the same living room emulsion on a bathroom wall. It will green-mould within twelve months in Indore’s monsoon. For lasting results in wet zones, consult our Bathroom Waterproofing Services.
Children’s rooms and high-traffic corridors: These surfaces require a washable emulsion that can withstand cleaning without leaving marks or losing sheen. The keyword is “washable”-not “premium.” Some premium matt emulsions are not washable; some mid-tier satin emulsions are highly washable. The durability of paint in a corridor is determined by washability and scuff resistance, not by pigment quality.
Bedrooms and living rooms (low traffic, no moisture exposure): Standard interior matt emulsions perform well here. This is where specifying a mid-tier product-rather than the most expensive-delivers good value without compromising durability. The ceiling should always use a flat white ceiling emulsion, not the wall emulsion-ceiling paint is formulated for splatter resistance and coverage on porous, absorbent surfaces.
Secret 6: How Many Coats-and Why Thickness Matters More Than Count
Two coats of interior emulsion at the correct wet film thickness outperforms three thin coats applied at high dilution. Most painters in Indore dilute emulsion excessively to increase coverage and reduce material cost, producing a paint film that is too thin to provide full hiding power, washability, or durability. Always specify undiluted or minimally diluted emulsion.
The dilution problem in Indore’s painting market: Standard interior emulsions are formulated to be applied at a specific dilution ratio-typically 10–20% water addition for the first coat, 5–10% for subsequent coats. This specification is printed on the product label. Local painters in Indore routinely dilute emulsion at 30–50% to increase the number of litres from one tin, producing a paint that covers more area per coat but deposits a thinner, weaker film. The result looks acceptable immediately after painting-colour is present, the wall looks fresh. Within twelve months, the thin film begins to show wear, chalking, and reduced washability. The homeowner thinks the paint was cheap. The paint was fine-it was the dilution ratio that failed.
Dry film thickness (DFT) and coverage: A properly applied coat of interior emulsion produces a wet film thickness of approximately 80–120 microns, which dries to a DFT of 40–60 microns. Two correctly applied coats produce a total DFT of 80–120 microns-the minimum for full hiding power, washability, and durability. Over-diluted paint at 40% dilution produces half this DFT per coat, requiring four coats to achieve the same film thickness-and most painters do not apply four coats. The homeowner ends up with 60 microns of DFT from three over-diluted coats, when they needed 120 microns.
How to verify at the time of painting: Ask your painter what dilution ratio he is using and compare it to the label. This is a simple request-the label is on the tin. If he cannot tell you the dilution ratio or says “hum hamesha aise karte hain” (we always do it this way), ask him to show you the tin and read the specification together. This conversation takes two minutes and can save you three years of premature repainting.
Secret 7: Crack Treatment Before Painting-Not After
Hairline cracks filled with wall putty and painted over will reopen within one season in Indore’s thermal cycling climate. Cracks in interior walls require flexible crack filler-not putty-applied in a V-groove opened with a tool, followed by reinforcing mesh tape on cracks wider than 2mm, before any putty or primer is applied.
Why putty-filled cracks reopen: Wall putty is a rigid material. When applied into a hairline crack, it fills the void but does not bond to both crack faces with sufficient adhesion to resist the thermal movement that caused the crack in the first place. Indore’s temperature cycling-walls can swing from 15°C in winter nights to 45°C in summer afternoons-causes plaster to expand and contract by small but consistent amounts each day. A rigid putty fill fails at the crack edges and reopens, typically within one monsoon season. The crack is now wider and has fresh paint lifting at its edges.
The correct crack treatment method, step by step:
- For hairline cracks under 1mm: V-groove the crack with a grout saw or utility knife to open it to 3–4mm width and 5mm depth; clean and prime the groove; fill with flexible acrylic crack filler; allow to cure; sand flush; prime again before putty.
- For cracks 1–3mm wide: same V-groove process; fill with flexible crack filler; embed a self-adhesive fibreglass mesh tape over the filled crack before the filler cures; apply a skim coat of filler over the mesh; sand and prime.
- For cracks wider than 3mm or with visible movement: these require a structural diagnosis before cosmetic treatment-they may indicate settlement or structural movement that painting over will only conceal temporarily. A structural engineer’s assessment is warranted before any interior finishing.
Indore-specific context: Vijay Nagar apartments built between 2010 and 2018 commonly show diagonal cracks at window corners-a classic plinth beam–wall interface crack caused by differential thermal movement between the concrete frame and the brick infill. These cracks will always reappear if treated with putty alone. They require flexible filler, fibreglass tape, and patience. Any painter who fills them with putty and promises they are fixed is giving you a 6-month guarantee dressed as a solution.
Secret 8: Post-Paint Maintenance That Homeowners Skip
Interior paint life is extended significantly by three maintenance habits: cleaning walls with mild soap and a soft cloth (not abrasive scrubbers), addressing new cracks or dampness immediately before they spread under the paint film, and ensuring bathroom and kitchen ventilation reduces moisture exposure on adjacent walls year-round.
Cleaning painted walls correctly: Most Indore homeowners either never clean painted walls (allowing dust and grease to accumulate and bond permanently with the topcoat) or clean them too aggressively (using abrasive scrubbers or phenyl-based cleaners that erode the paint film). The correct method: a soft microfibre cloth dampened with warm water and a few drops of dishwashing liquid, wrung nearly dry, wiped gently in one direction. For stubborn stains, a diluted mild detergent solution. Never use bleach, acid-based bathroom cleaners, or abrasive pads on emulsion walls-these dissolve the paint binder.
Addressing new cracks immediately: A hairline crack that appears in a freshly painted wall should be noted and treated at its first appearance-not when it grows wide enough to be visually disturbing. The cost of filling a 1mm crack is negligible. The cost of treating the same crack at 5mm width-with paint peeling on both sides, possible moisture ingress, and a visible repair scar-is significantly higher. If you see a crack appear on a freshly painted wall within the first six months, it is almost always a settlement crack from new construction-completely normal. Fill it with flexible crack filler. Do not wait.
Kitchen and bathroom ventilation as a paint life extender: The single most impactful thing a homeowner can do to extend the paint life on kitchen and bathroom-adjacent walls is to run the kitchen exhaust fan while cooking and the bathroom exhaust while bathing. This is not a painting tip-it is a physics tip. Steam and cooking vapour absorbed by paint films over years accelerates degradation. A kitchen exhaust that removes 90% of cooking steam extends the kitchen wall paint life by two to three years compared to the same kitchen with no ventilation. This costs nothing additional after installation.
How Long Should Good Interior Paint Last in Indore? - A Realistic Guide
In Indore’s climate, professionally applied interior emulsion on correctly prepared walls lasts 6–9 years in bedrooms, 4–6 years in kitchens, and 3–5 years in bathrooms. Paint on walls with untreated moisture, incorrect primer, or over-diluted application typically fails within 18–36 months. The difference is surface preparation, not paint brand.
- Living room and bedroom (external-facing wall, correctly prepared, alkali-resistant primer, premium emulsion): 7–9 years before colour fade or sheen loss warrants repainting
- Living room and bedroom (internal wall, no moisture exposure): 9–12 years-these walls often outlast the owner’s desire to keep the same colour
- Kitchen (washable satin emulsion, exhaust ventilation used): 4–6 years
- Bathroom upper wall (mould-resistant emulsion, adequate ventilation): 3–5 years
- Corridor and high-traffic areas (washable emulsion): 5–7 years with regular wiping
- Ceiling (flat white ceiling emulsion, no moisture): 7–10 years-ceilings last longer because they have no direct contact or abrasion
A paint job on an improperly prepared wall-skipped primer, wet plaster, excessive dilution-will show visible deterioration within 18–24 months in Indore’s climate. The difference between a 2-year paint job and an 8-year paint job is almost entirely in the preparation, not the product.
Comparison Table: Professional Painting vs. Typical Local Painter Approach in Indore
| Parameter | Typical Local Painter in Indore | Vishwas Homes Professional Approach |
|---|---|---|
| Moisture Check Before Starting? | No - begins immediately after monsoon | Yes - digital moisture meter; minimum 12% moisture content confirmed |
| Primer Specified to Substrate? | Standard white primer on all walls | Alkali-resistant primer on damp-prone and fresh plaster walls; sealer on porous walls |
| Putty Applied Over Primer? | Often putty directly on bare plaster | Always primer first, putty second, primer again before topcoat |
| Putty Type on Damp Walls? | Standard white cement putty | Polymer-modified putty on moisture-exposed surfaces |
| Emulsion Dilution Ratio? | 30–50% (to save material cost) | 10–20% first coat, 5–10% second coat - per product specification |
| Crack Treatment Method? | Wall putty pressed into crack | V-groove, flexible filler, fibreglass mesh on cracks over 1mm |
| Paint Grade Matched to Room? | Same emulsion across all rooms | Kitchen and bathroom specified separately with washable/mould-resistant grades |
| Recoat Timing Between Coats? | Same day, often 1–2 hours | Minimum 4–6 hours per product TDS; surface film-dry confirmed |
| Expected Paint Life (Bedroom Wall) | 2–4 years | 6–9 years |
| Written Warranty? | Verbal only | Written 2–5 year warranty (Vishwas Homes) |
| Material Manifest Provided? | No | Yes - GST-itemised material list from Pipliyahana shop |
Verdict: The difference between a 2-year paint job and an 8-year paint job in Indore is not the paint brand-it is what happens before the paint goes on. A professional preparation sequence (moisture check, correct primer, polymer-modified putty on damp walls, flexible crack filler, specified dilution ratios, correct recoat timing) consistently produces paint life of 6–9 years in Indore’s climate. Vishwas Homes applies this preparation sequence on every interior painting project in Indore, with a written 2–5 year warranty on both materials and labour. You can learn more on our Interior House Painting Services page.
Frequently Asked Questions
When is the best time to paint interior walls in Indore?
October to March is the best time-this is the post-monsoon dry season. By this time, walls have had time to dry, humidity is low, and the temperature is ideal for paint film formation. Avoid June–September for exterior-facing walls. Internal walls with no moisture issues can be painted year-round with adequate ventilation.
What is the correct number of coats of wall putty for interior painting?
Two coats, with sanding between coats, is correct-not one thick coat. Thick putty application shrinks and cracks as it dries. Two thin coats produce a smoother, more stable base. Remember, primer must be applied before the first putty coat and again after the final sanded putty coat.
Does expensive paint last longer than budget paint if the surface preparation is the same?
Marginally. Premium emulsions have higher pigment concentration and denser film-forming polymers that improve washability and colour retention. But the difference between premium and mid-tier on a correctly prepared wall is only 1–2 years of additional life. On an incorrectly prepared wall, both will fail at the exact same rate.
Why do interior walls develop black spots after painting in Indore?
This is mould growth, caused by persistent moisture on the wall surface. It usually results from bathroom adjacency, poor ventilation, or unresolved rising damp. Mould-resistant emulsions slow the growth but do not eliminate it if the moisture source continues. The moisture source must be professionally treated.
Can I paint directly over old peeling paint without stripping it?
No. Peeling paint indicates the existing film has lost adhesion to the substrate. Painting over it bonds the new coat to the failing old coat, not to the wall. The new coat will peel at the same rate as the old one. All loose and peeling paint must be scraped to a stable edge and the exposed area primed before repainting.
How do I know if my painter is diluting paint too much?
Ask to see the empty tin and the mixing bucket together. The tin explicitly specifies the dilution ratio. If the painter cannot recall what he added or says he “does it by eye,” request that the next batch is mixed per the label specification in your presence. Reputable painters carry the product technical data sheet and follow it meticulously.
Conclusion: The Conversation to Have With Your Painter Before Diwali
Diwali is eight to ten weeks away from when you are reading this. If you are planning an interior repaint, your painter shortlist conversations are probably starting soon. Here is what I would tell my own family to ask before signing anything.
When interviewing a painter, ask these five specific questions: Will you check wall moisture before starting, and can I see the reading? What primer will you use on the external-facing bedroom walls? At what dilution ratio will you mix the emulsion? How will you treat cracks-putty only, or flexible filler with mesh? Do you provide a written warranty? A painter who answers all five confidently and specifically is likely prepared to do the work correctly. A painter who says “hum sab karte hain” (we do everything) without specifics is telling you that preparation is not his priority.
If you are in Indore and want a free site assessment before your Diwali painting project-including a moisture check, surface condition assessment, and an itemised quote with a material manifest-WhatsApp us at 070672 58993 or visit our digital showroom at vishwaspaints.com. We have been doing this in Indore since 1980. We know what your walls need.

About the Author: Rajesh Vishwas
Rajesh Vishwas has been a leading figure in Indore’s painting and waterproofing trade since 1980. With 45 years of hands-on experience dealing with the city’s unique climate challenges, Rajesh specializes in diagnosing and permanently resolving complex seepage, dampness, and efflorescence (shora) issues across Indore’s residential and commercial properties.